This is the multi-page printable view of this section. Click here to print.
How-to guides
- 1: How to get root access via SSH
- 2: How to change the DNS provider to deSEC
- 3: How to manually clean up your server's disk space
1 - How to get root access via SSH
To access your server’s root shell you will have to generate your SSH key and add it to your server’s authorized keys.
How to generate SSH key
If you are a Unix-like system user
- Open the terminal.
- Run the following command:
You will be asked to enter a passphrase. You can leave it empty, but it is recommended to use a passphrase. If you do not want to use a passphrase, press Enter.
ssh-keygen -t ed25519 -f ~/.ssh/id_ed25519 - Print the public key to the terminal and copy it:
cat ~/.ssh/id_ed25519.pub - Refer to the next section to add the key to your server.
If you are a Windows user
- Open settings and under “Applications” click on “Manage additional components”.
- Press “Add Component”.
- Enter “OpenSSH client” in the search box and install it.
- Open the Command Prompt. You can do this by pressing Win+R, typing
cmdand pressing Enter. - Run the following command, replacing
user_namewith your Windows username:You will be asked to enter a passphrase. You can leave it empty, but it is recommended to use a passphrase. If you do not want to use a passphrase, press Enter.ssh-keygen -t ed25519 -f C:\Users\user_name\.ssh\id_ed25519 - Print the public key to the terminal and copy it:
Once again, replace
type C:\Users\user_name\.ssh\id_ed25519.pubuser_namewith your Windows username. - Refer to the next section to add the key to your server.
If you are a Android (Termux) user
- Install Termux. We recommend installing it from F-Droid.
- Open Termux.
- Run the following command:
You will be asked to enter a passphrase. You can leave it empty, but it is recommended to use a passphrase. If you do not want to use a passphrase, press Enter.
apt update -y && apt upgrade -y && apt install openssh -y && ssh-keygen -t ed25519 -f /data/data/com.termux/files/usr/etc/ssh/ssh_host_ed25519_key - Print the public key to the terminal and copy it:
cat /data/data/com.termux/files/usr/etc/ssh/ssh_host_ed25519_key.pub - Refer to the next section to add the key to your server.
How to add the key to your server
- Open the SelfPrivacy app.
- Go to the “More” tab.
- Tap on “Superuser SSH keys”.
- Tap on the “Create SSH key” button.
- Paste the public key you copied earlier.
- Tap on the “Create SSH key” button.
- Open the Jobs list
- Tap on the “Start” button.
- In a few minutes, you will be able to access your server’s root shell via SSH.
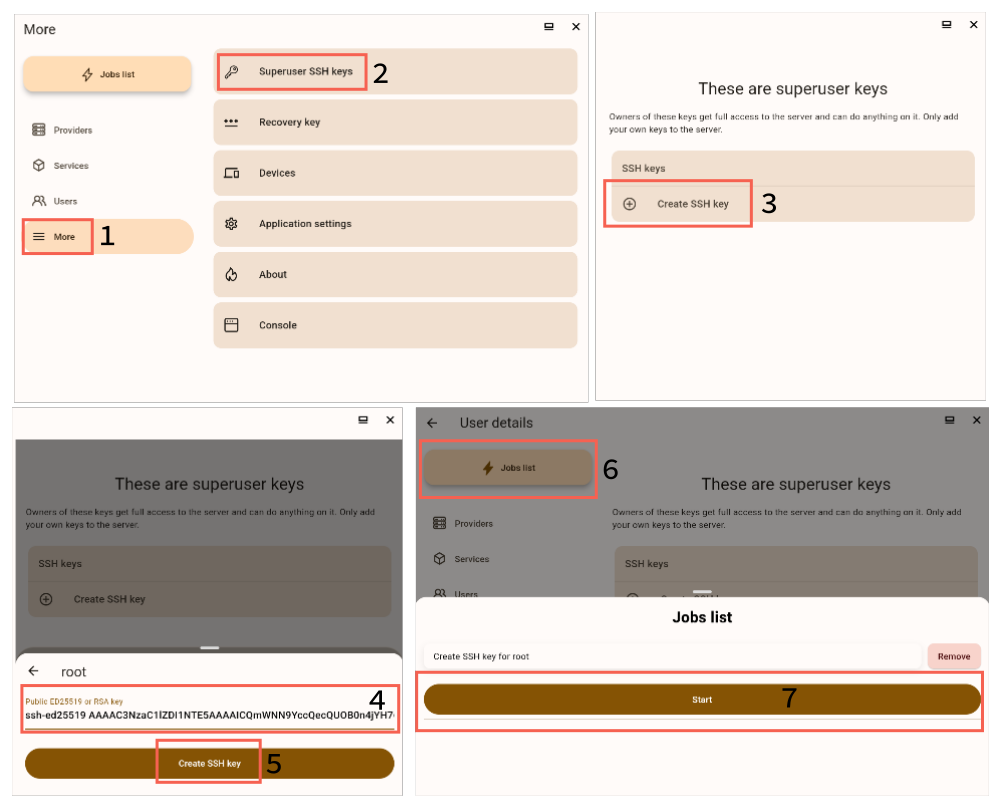
How to access your server’s root shell via SSH
- Open the terminal or Command Prompt.
- Run the following command, replacing
server_domainwith your server’s domain:ssh root@server_domain - Enter the passphrase you entered when generating the SSH key, if you used one.
Be careful when using the root shell. If you do not know what you are doing, you can break your server or leak your data. Responsibility for the consequences of your actions lies with you. Respect the privacy of other users.
2 - How to change the DNS provider to deSEC
We recommend using deSEC instead of CloudFlare. DeSEC is dedicated to privacy.
If you have first tied your domain to CloudFlare and now you want to change providers, this article is for you.
Attention, the process is quite complicated, and if you feel that something goes wrong, you can feel free to write us in the chat.
During this process, your services will be temporarily unavailable. Also, write down the IP address of your server, as you will not be able to access it by domain name.
Transferring the nameserver
A nameserver is a server that translates your domain (letters) into a server IP address (numbers).
-
Register with deSEC.
-
On the “domains” page, click on the “plus” button.
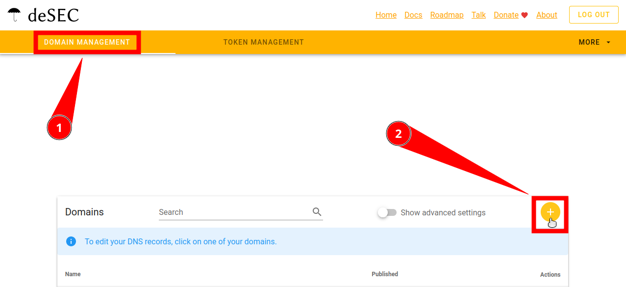
-
Enter your domain.
-
Copy “nameservers”.
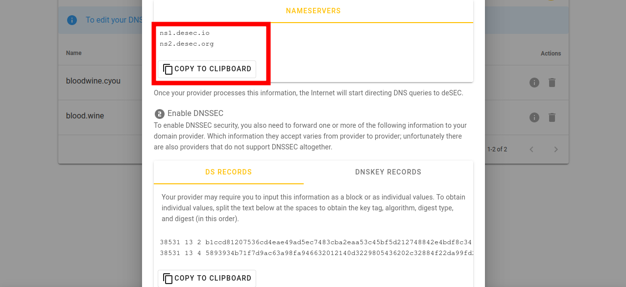
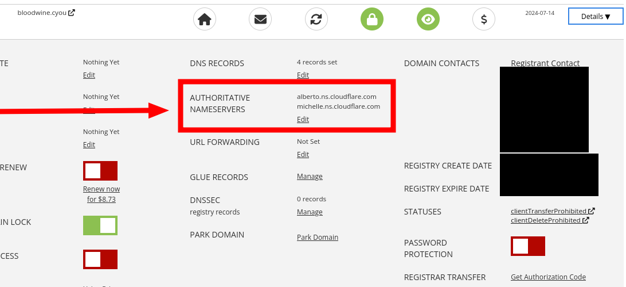
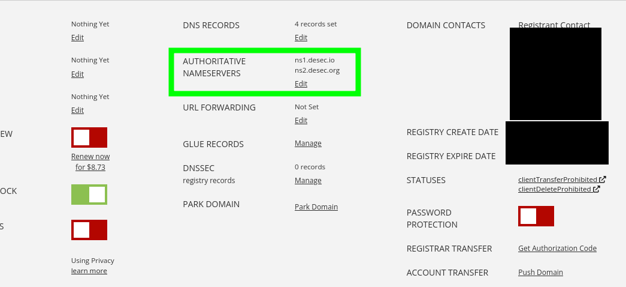
Now go to the website of the domain registrar from whom you purchased the domain. The actions will be similar for all providers, we will show using Porkbun as an example.
-
Go to your domain control panel.
-
Find there the “Authoritative nameservers” parameter.
-
Replace the current addresses with those that we copied from deSEC in the instructions earlier.
-
Save the changes.
Getting the deSEC token
-
Log in here.
-
Go to the Domains page.
-
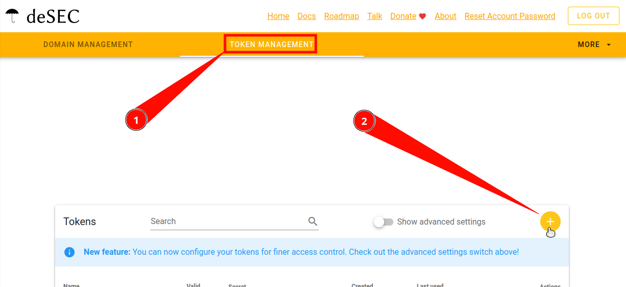
Go to the Token management tab.
-
Click on the round “plus” button in the upper right corner.
-
“Generate New Token” dialogue must be displayed. Enter any Token name you wish. Advanced settings are not required, so do not touch anything there.
-
Click on Save.
-
Make sure you save the token’s “secret value” as it will only be displayed once.
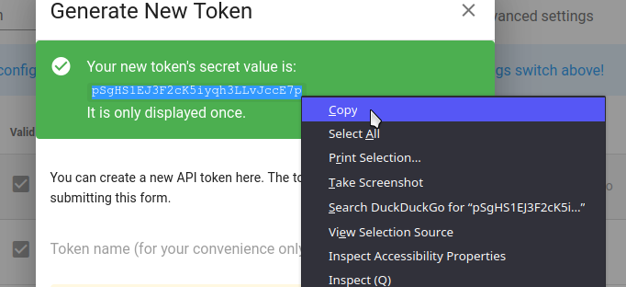
- Now you can safely close the dialogue.
Migrating records
Log into both CloudFlare and deSEC.
On the deSEC website
Follow the link in the “Domain Management” panel, click on your domain.
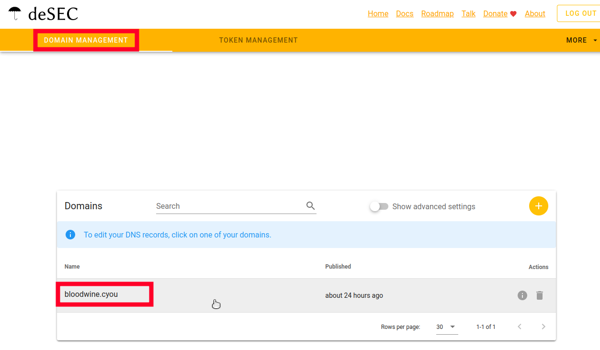
Now you can add new entries to it using the “Plus” button.
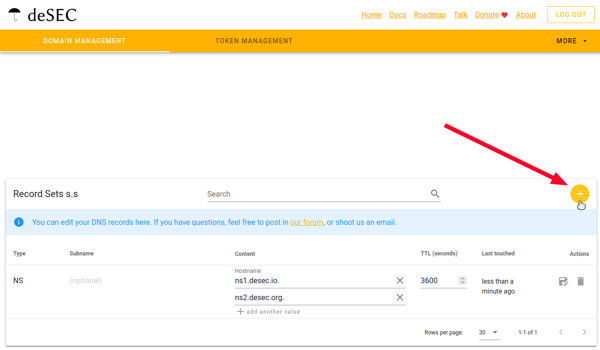
On the CloudFlare website
Follow this link and go to the settings of your domain, which is located under the “Websites” section.
Select your domain.
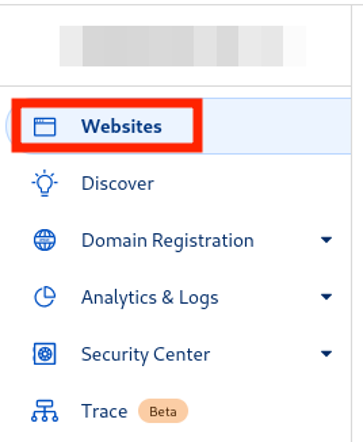
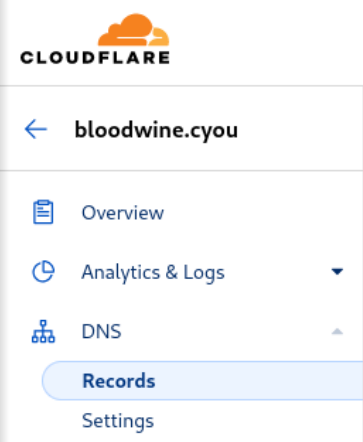
Now go to “DNS”, then “Records”.
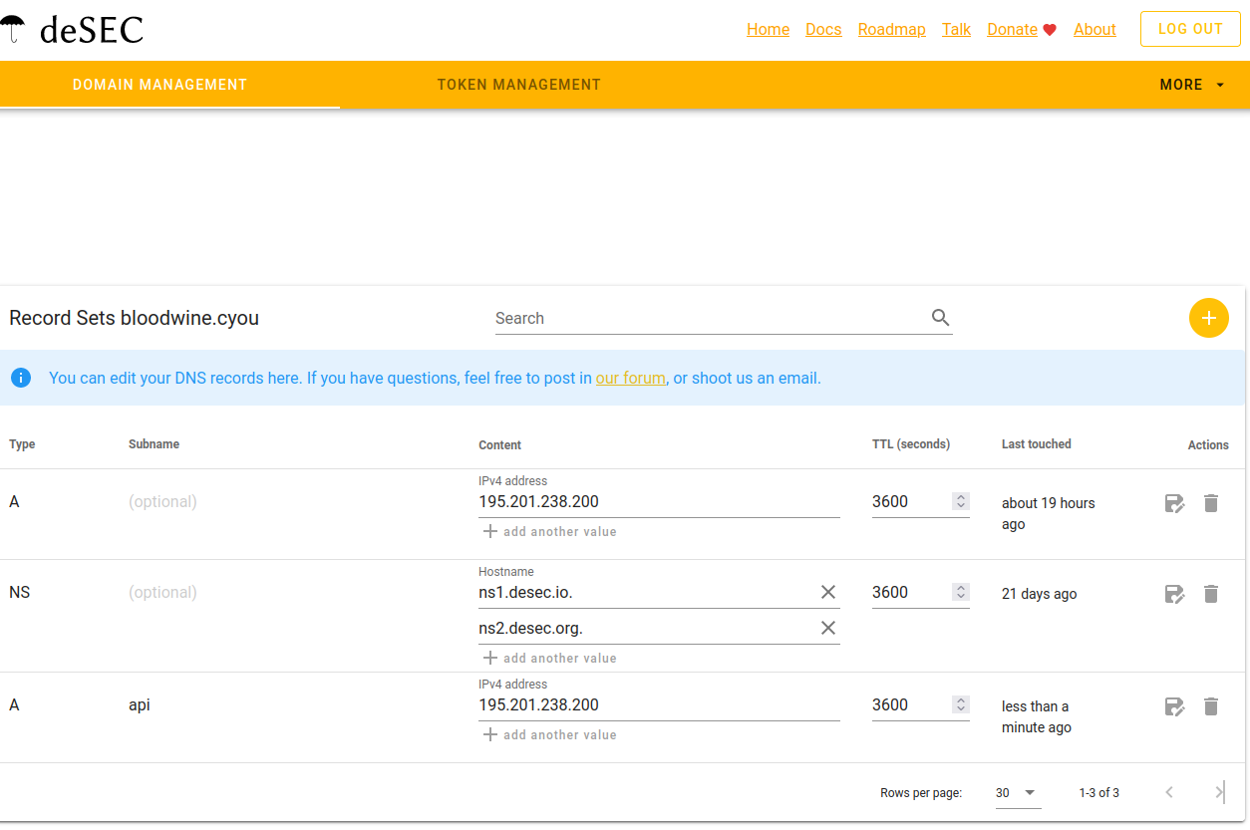
First record: api
Based on the example in the screenshot, transfer the parameters of your “api” record (look at the “Name” column) according to their colors.
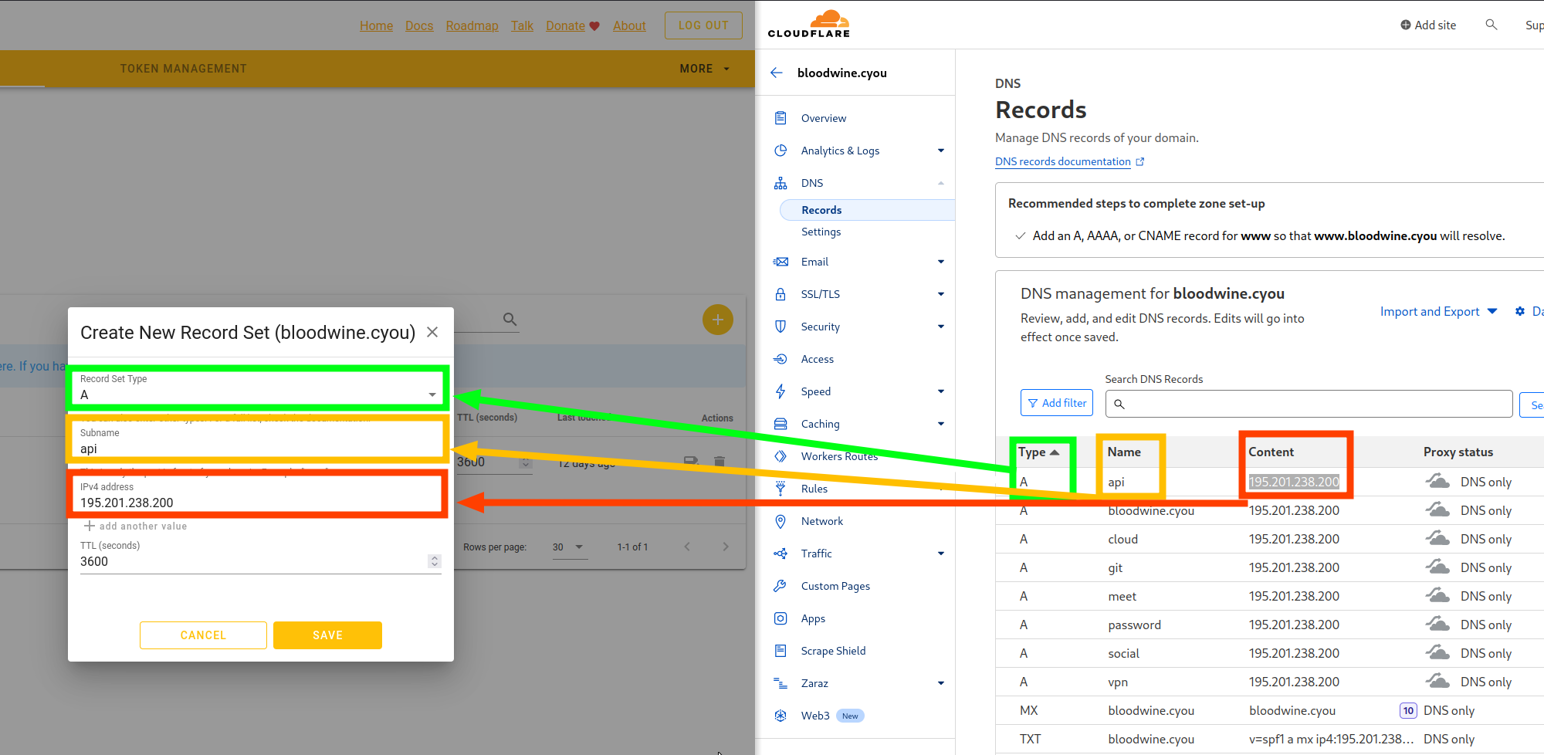
On the left side of the screenshot is deSEC, and on the right side is Cloudflare. You need to sequentially transfer each parameter of this record.
Second record: root
Create a new record of type “A”, in the “IPv4 address” field, enter your server address, which you have already entered in the “Content” field of the previous record.
You don’t need to transfer all the records! You have created two records, and the third one has already been created for you.
Connecting to the server
To perform the following actions, you will need to connect to the server via SSH with administrator privileges. Basic understanding of the command line is recommended ;)
You can find instructions on how to connect here.
After connecting to the server, enter the following command:
nano /etc/nixos/userdata.json
You are in a terminal text editor called “nano”.
You are editing the file /etc/nixos/userdata.json, and you can use the arrow keys to navigate.
Find the following lines in the file:
"dns": {
    "provider": "CLOUDFLARE",
    "useStagingACME": false
},
Replace:
"provider": "CLOUDFLARE",
with
"provider": "DESEC",
Now press CTRL+X, and then key Y.
Then edit another file:
nano /etc/selfprivacy/secrets.json
Find the following:
"dns": {
    "apiKey": "SECRET-HERE"
},
Remove your old token from CloudFlare and paste the copied token from deSEC. (If CTRL+V doesn’t work, try SHIFT+CTRL+V)
"apiKey": "Your deSEC token",
It should now look like this:
"dns": {
        "apiKey": "Your deSEC token"
    },
Press CTRL+X, then Y to save the file.
If the file has been saved and you have successfully exited the text editor, enter the command:
systemctl start sp-nixos-rebuild.service
It will start the rebuild of your system with new options. You may close the console now.
Reconfiguring the application
You will have to reset the application config to work properly. Don’t forget to create a recovery key and save it in a safe place (password manager).
How to reset the application:
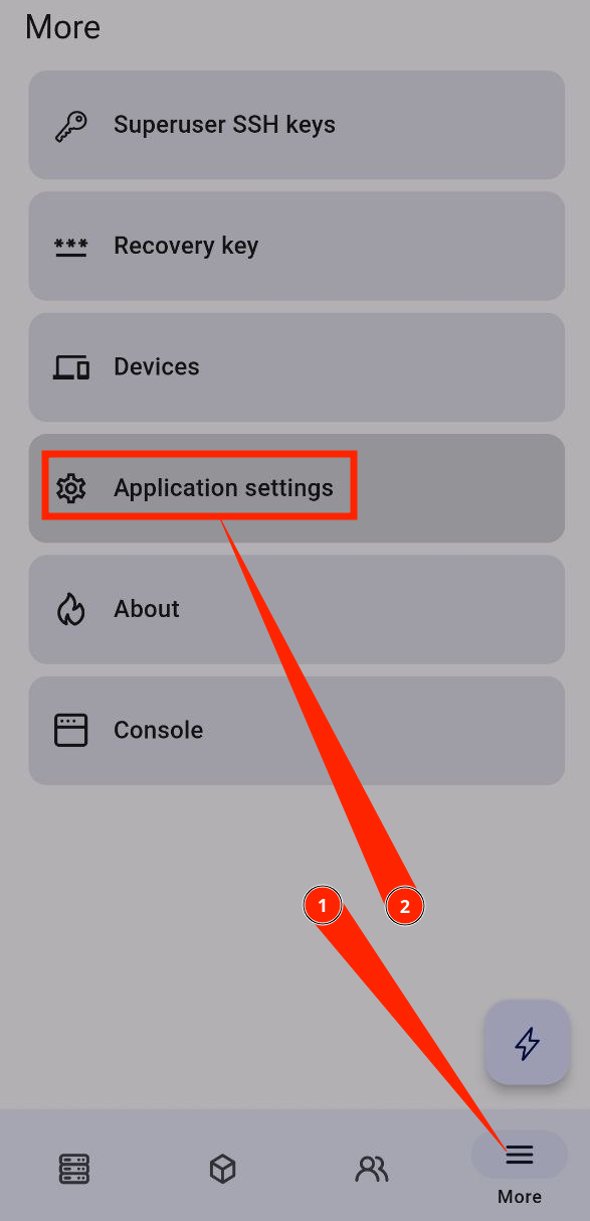
Go to Application Settings.
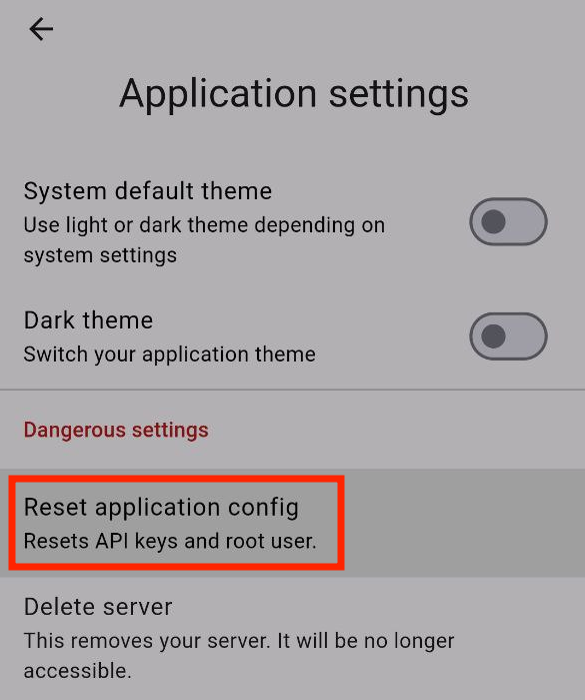
Press “Reset application config”.
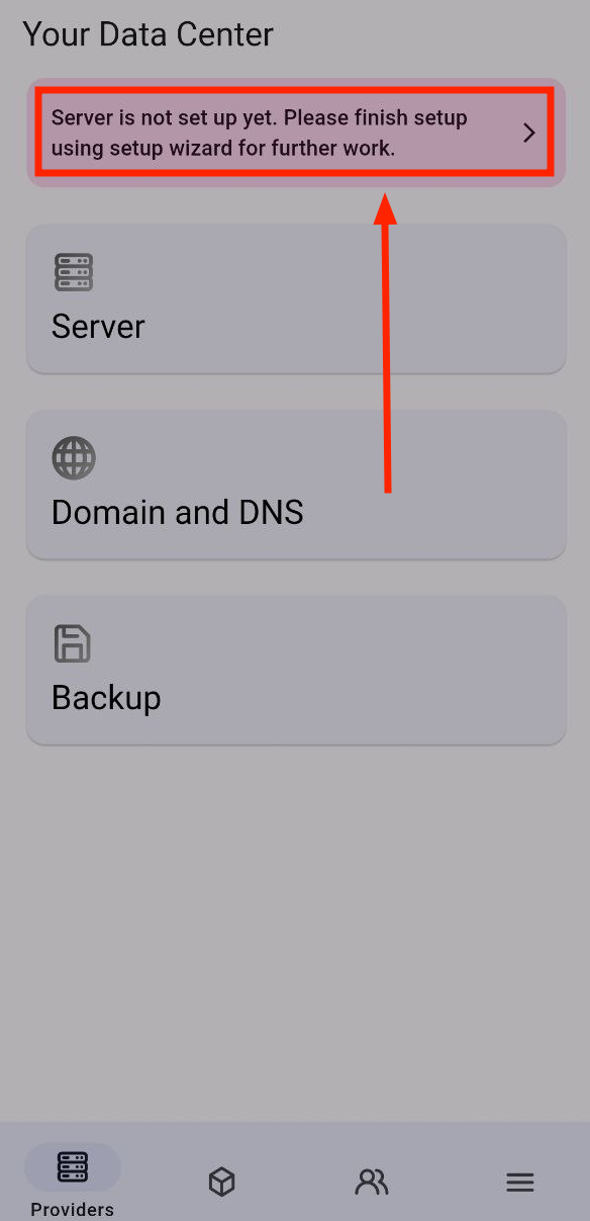
Now go to the “Setup Wizard” section where you configured your server when you first launched the application.
Tap “I already have a SelfPrivacy server!”.
(In the old version it might be called “Connect to an existing server”).
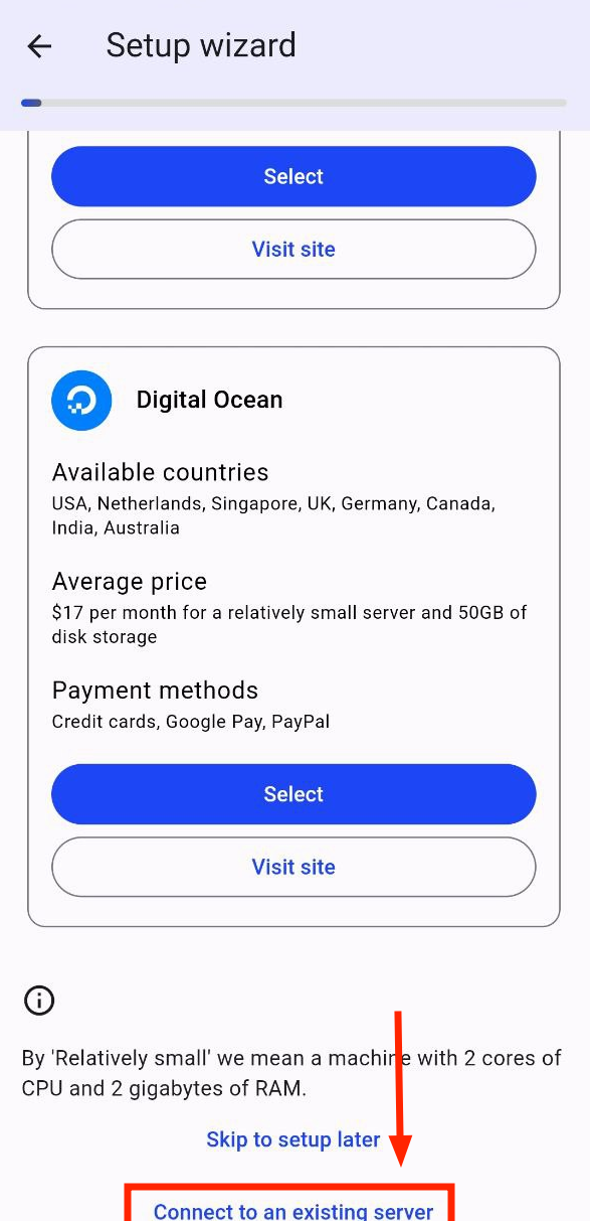
Next, follow the instructions in the app and enter the recovery key or code from another device where the SelfPrivacy app is installed.
After installation, you will see some problems with Domain and DNS. The application will offer you to fix them. Accept the fixes.
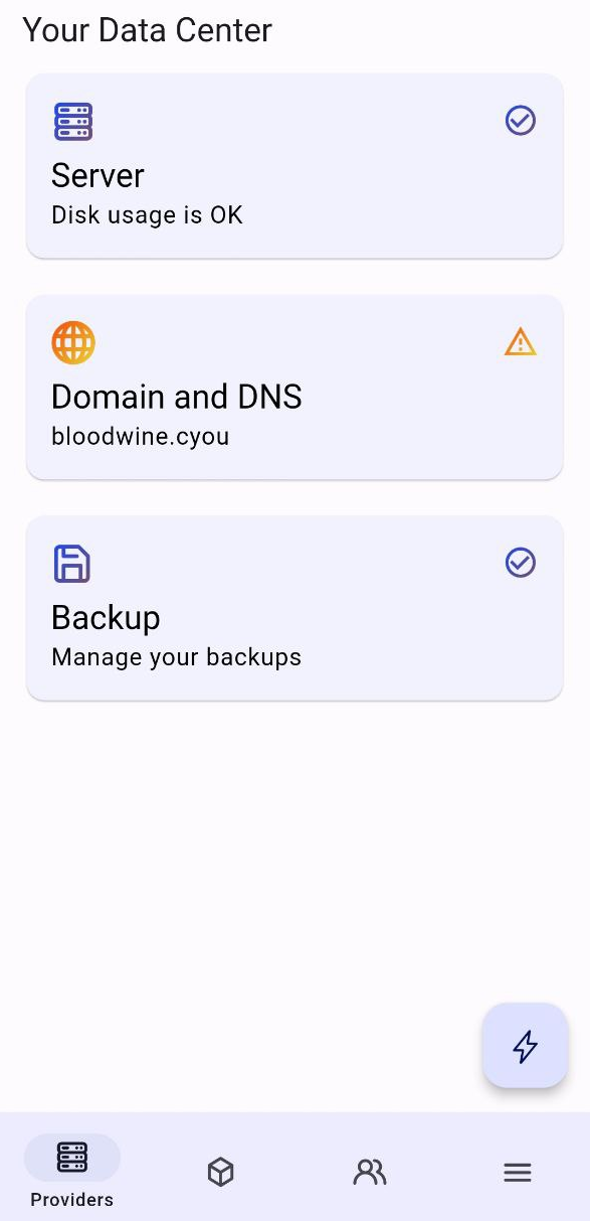
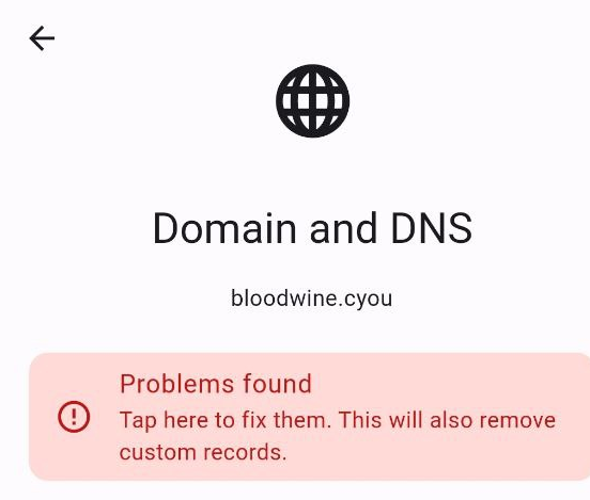
Congratulations! You have successfully changed your domain provider. We recommend you to check that all services are working correctly.
3 - How to manually clean up your server's disk space
All commands in this guide are executed as root over SSH. If you do not have root access, see this guide for more information.
If you have no space left, you will only be able to use the SSH keys you previously added. If you run out of disk space and have not added any SSH keys, contact SelfPrivacy support for further assistance.
There are several ways to clean up your server’s disk space.
To check how much disk space you have, run the following command:
df -h
This will output a table like this:
Filesystem      Size  Used Avail Use% Mounted on
devtmpfs         97M     0   97M   0% /dev
tmpfs           969M   52K  969M   1% /dev/shm
tmpfs           485M  3.8M  481M   1% /run
tmpfs           969M  432K  968M   1% /run/wrappers
/dev/sda1        19G  8.2G  9.5G  47% /
/dev/sdb         18G   62M   17G   1% /volumes/sdb
tmpfs           194M     0  194M   0% /run/user/0
Here, the filesystem mounted on just / is your system volume.
Deleting old NixOS generations
This method won’t work if you have no space left on your system volume. Use other methods first.
NixOS allows you to roll back to previous system states at any time, at the cost of disk space. SelfPrivacy servers are configured to reclaim disk space by automatically deleting old system states, but only states older than 7 days are deleted, so you can still use the rollback feature.
It is possible to manually delete all old system states, and it may give you more much needed disk space. To do this, simply run the following command as root:
nix-collect-garbage -d
This operation might take a while, depending on the number of system states you have. When it is done, you will see how much disk space you have freed up.
Deleting old logs
Logs sometimes may take up quite a lot of disk space. On SelfPrivacy servers, system logs are always limited to 500MiB, but these are not the only log files you have on your server.
To check how much disk space logs take up, run the following command:
du -h --max-depth=1 /var/log
The output will look something like this:
4.0K	/var/log/private
14M     /var/log/nginx
499M	/var/log/journal
587M	/var/log
System journal
Here, /var/log/journal are the system logs where all apps usually write their logs. As you can see in this example,
they respect the 500MiB limit.
If you want to clear all system logs, run the following command:
journalctl --rotate && journalctl --vacuum-time=1s
This will usually give you around 450 MiB of free disk space, but not for long. This may though be enough to run some commands that will free up more space.
Nginx logs
The /var/log/nginx directory contains logs for the Nginx web server. If they got too big, you can clear them by running:
rm /var/log/nginx/* && systemctl reload nginx
As you can see, we don’t just delete the files, but also reload Nginx. This is because Nginx will get confused by the missing log files, and they will not be recreated until Nginx is reloaded.